

How to Grow Dill Herbs from Seed
- Latin Name: Anethum graveolens
- Days to Maturity: Biennial grown as an Annual, 65 days til harvest
- Hardiness Zone: 3-11
- Planting Depth: 1/4"
- Plant Spacing: 9-12”
- Germination Time: 10-14 days
- Growth Habit: Upright, top-heavy
- Soil Preference: Well-drained and moderately fertile
- Temp Preference: Warm
- Light Preference: Full sun
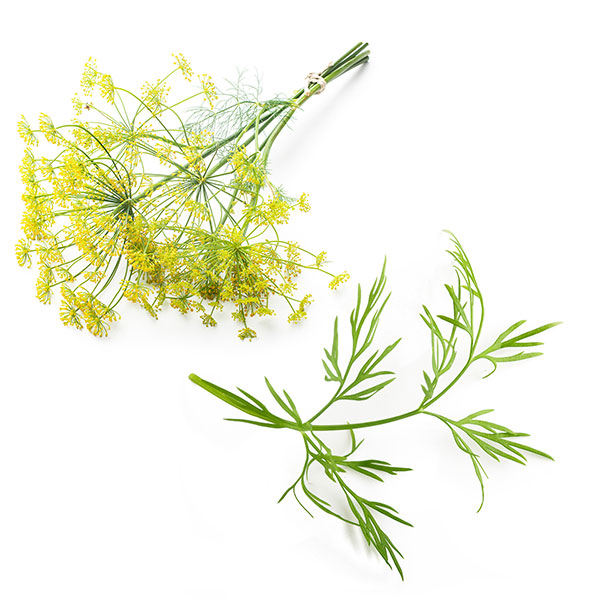
- Color: Dark-green with yellow flower clusters
- Flavor: Pickle with hints of anise
- Availability: See All Dill Seed Varieties
>>> See Full Herb Grow Guide List <<<
Is Dill an Annual or Biennial?
While technically dill is a biennial (also referred to as a short-lived perennial), it is rarely grown as such, since it is either grown for its feathery leaves or it's seeds. Usually, the dill root system will survive the winter, and if it does, the flavor in the leaves will be diminished. This is why it is popularly grown as an annual.
Sowing Dill Seeds
Inside Starts - Plant seeds in plug trays 4 to 6 weeks before you plant to transplant the dill seedlings in your garden, which should be 3 to 4 weeks before the first frost.
Outdoor Direct Sowing - Sow dill seeds once the soil is able to be worked. Dill prefers temperatures between 60 and 70°. Reseed every 2 weeks into midsummer for a continuous supply. Like many herbs, dill can withstand the heat. Germination takes 10 to 14 days.
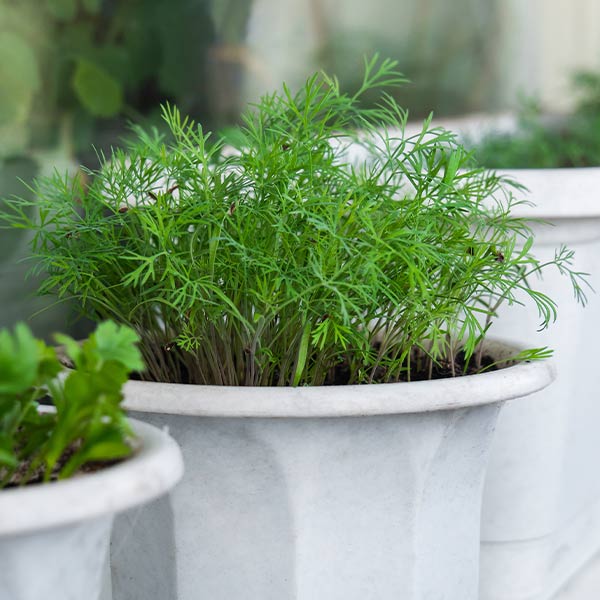
Container Growing - If you are planning on growing dill in a growing container, sow it in that growing container. If you are starting dill indoors, simply transfer that growing container outside when conditions are warm enough. You can also opt to sow your dill seeds in that container outdoors when you would normally direct sow seeds in a garden bed. Keep in mind that this growing container needs to be at least 2 feet deep and 1 foot wide.
Growing and Maintaining Dill
Outside in a Garden Bed - If you start seeds indoors (whether in a container or plug trays), you'll need to "harden off" your seedlings, a process by which you acclimate seedlings to outdoor conditions. As your dill seedling developed indoors, they became used to the consistent conditions. Hardening off is a 2 to 3 week process where you place your seedlings outside for increasing periods until they can remain outside through the night. Transplant into your prepared garden bed and water heavily. It is preferable to to transplant dill in the morning time so that the heavy watering can evaporate a bit throughout the day. Water-logged ground throughout the night can smother your dill seedlings.
Outdoor/Indoor Container Growing - You can certainly grow dill in a container indoors or on an enclosed porch as long as the dill herb receives at least 8 hours of sunlight per day. Keep soil slightly moist but be careful not to water too much as evaporation is slowed by remaining inside. Harvest the leaves as you need them and pinch the tops to prevent flowers; however it is unlikely to occur when growing indoors. Hardening off is necessary for the container grown seedlings. Once your container of dill has gone through the hardening off process, place it in the spot you desire. Keep the soil from completely drying out.
Harvesting Dill Leaves and Seeds
Leaves - You can begin harvesting 60 days from the sow date or as soon as the plant has produces several leaves. Keep plants pruned to delay flowering. If your plant goes to seed, there is a strong chance that the leaves will diminish in flavor.
Seeds - Growing dill for seeds requires less maintenance because the goal is to allow it to flower and go to seed. So, it is a waiting and watching game. Watch you umbel flower bloom and then allow the dill seed pods to form and turn brown. Once they do, clip the dried umbels and place in a paper sack. Shake and gather the seeds from there. Seeds are strong in dill flavor, used famously in the pickling process of cucumbers.

Possible Pests
Aphids - These tiny little bugs will attach themselves to the soft foliage of the dill plant, causing deteriorated sections. The best way to deal with aphids is to gently remove them by hand or with a gentle stream of water, and then to lay down a soap or oil water mixture at the base of the dill herb.
Cutworms - With dill, cutworms will attach themselves to the stems and branches and cause shallow to deep wounds in the stems and branches. They are caterpillar-like worms. The best way to deal with this infestation is to remove by hand and apply diatomaceous earth at the base of the plant.
Possible Diseases
Downy Mildew - A fairly common disease among houseplants, downy mildew appears as yellow spots on the upper half of the leaves and will turn darker as the disease matures. It can result of dill being overcrowded in the garden bed.
Leaf Blight - Leaf Blight will appear as dark spots or flecks on your dill herb stems. It is a fungal disease resulting from the soil. It is a hard disease to treat in a developing dill herb, but you can avoid it by applying appropriate fungicides.
Dill as a Companion Plant
Belonging to the Apaceae family, dill is known for drawing beneficial pollinators near, mostly due to it's aroma and the resulting umbel flowers that bloom in the high heat. A good rule of thumb with dill and other members of Apacieae is to not plant them close to one another as they will stunt each other's growth. Probably due to their similar growth habit. Some noteable garden vegetable to plant dill next to would be asparagus, cucumbers, corn, lettuce, onion, brassicas, and basil.
Explore these Dill Herb Seed Varieties:
- Organic Bouquet Dill Herb Seeds
- Bouquet Dill Herb Seeds
- Dwarf Fernleaf Dill Herb Seeds
- Mammoth Long Dill Herb Seeds
Learn More About Dill Seed: